Tilewise DIY Studio
DIY Tiling That Looks Professionally Finished
Plan your project, choose the right materials, and install tiles with clear guidance from the first measurement to the final grout line.
Plan your project, choose the right materials, and install tiles with clear guidance from the first measurement to the final grout line.
DIY tiling can transform a tired bathroom, kitchen, hallway, or fireplace without the cost of a full contractor-led renovation. Tilewise DIY Studio helps homeowners replace guesswork with a practical plan, accurate measurements, and calm step-by-step instruction. Our resources explain adhesive choice, surface preparation, tile spacing, cutting, grouting, and finishing in language that first-time renovators can actually use. Whether you are planning a small backsplash or a complete floor, DIY tiling becomes far more manageable when every decision is made before the first tile is set.
We combine hands-on installation experience with design awareness, so your project is not only durable but also visually balanced. You will learn how to check a wall or floor for movement, calculate realistic material quantities, create a layout that avoids awkward slivers, and select tools that suit your tile type. Our DIY tiling advice is built around real rooms, real budgets, and the small details that often separate a neat result from an expensive rework. We also show you where saving money is sensible and where choosing better materials protects the finished surface.
Our goal is to help you work confidently while knowing when a task needs extra care or a qualified tradesperson. Every guide includes preparation notes, practical checkpoints, and troubleshooting suggestions for common problems such as lippage, hollow tiles, uneven grout lines, and cracked corners. With a clear schedule and a sensible shopping list, many homeowners can complete a compact DIY tiling project over a weekend and larger spaces over several planned sessions. Start with your room measurements, tell us what you want to achieve, and receive focused direction instead of generic renovation advice.
We build advice around your room dimensions, tile format, substrate, and design goal rather than offering a one-size-fits-all checklist. This makes DIY tiling more predictable and reduces waste before you buy materials.
Instructions are broken into realistic actions with checkpoints for leveling, spacing, cutting, and curing. You always know what to do next and what a correct result should look like.
Our calculations account for cuts, pattern repeats, breakage, and spare tiles for future repairs. Better estimates keep DIY tiling within budget without leaving you short halfway through the job.
We help you decide which tools to buy, rent, or borrow based on the tile and project size. That prevents beginners from spending hundreds on equipment they may use only once.
A strong layout makes a room feel intentional, especially around corners, niches, drains, and doorways. Our DIY tiling plans balance symmetry, visual flow, and practical cutting.
You learn how to spot loose substrate, poor adhesive coverage, uneven cuts, and grout problems early. Catching these issues before materials cure can save days of work and a costly rebuild.
Send us your dimensions, photos, and tile size for a practical review of quantities, starting points, and difficult areas. This DIY tiling service gives you a reliable foundation before shopping.
$49We prepare a marked layout showing tile direction, center lines, cuts, feature areas, and transitions. Your DIY tiling installation begins with fewer surprises and a cleaner visual rhythm.
$129Receive a detailed list covering tile, adhesive, grout, trim, membranes, spacers, sealers, and essential tools. The list includes quantities and practical alternatives for different budgets.
$79Use a 45-minute call to discuss substrate condition, tile choice, cutting questions, or a problem already appearing on site. This DIY tiling consultation gives you direct answers while the room is in front of you.
$89We review your proposed wet-area preparation and identify vulnerable corners, penetrations, transitions, and drain details. Proper waterproofing is the part of DIY tiling that protects the structure beneath the finish.
$159If tiles are lipping, cracking, sliding, or showing inconsistent joints, we diagnose the likely cause and map out the least wasteful correction. The session is designed to bring DIY tiling back under control before more adhesive or grout is applied.
$119Send room measurements, tile dimensions, surface photos, and your preferred finish. We identify missing information and highlight risks before recommending materials.
You receive a layout, quantity estimate, tool list, and sequence of work suited to your project. The plan turns DIY tiling into a series of manageable decisions instead of one intimidating task.
Clean, flatten, prime, and waterproof where required before opening the adhesive. We provide simple checks for movement, moisture, level, and bond so problems are solved at the correct stage.
Install from the planned reference lines, maintain consistent joints, and check coverage as you work. Guidance covers safe cutting, edge pieces, transitions, and the pauses needed for a clean DIY tiling result.
After the adhesive cures, grout methodically and protect movement joints, corners, and wet-area transitions. Final sealing, cleaning, and inspection help the new surface stay sharp and functional.
I had never tiled before and was nervous about a 42-square-foot kitchen backsplash. The layout plan showed exactly where to start and kept the visible cuts at the cabinet ends. Our DIY tiling weekend finished in two days, and we used only one extra box of tile.
The bathroom floor had an awkward doorway and a drain that made the pattern look difficult. Tilewise adjusted the layout and caught that my old plywood needed additional preparation before DIY tiling. The finished 65-square-foot floor has straight joints and no hollow spots after six months.
I booked a rescue call after several porcelain tiles started rocking. The advice quickly pointed to poor adhesive coverage and an uneven surface, not a bad batch of tile. We removed six pieces, corrected the base, and completed the DIY tiling without replacing the whole room.

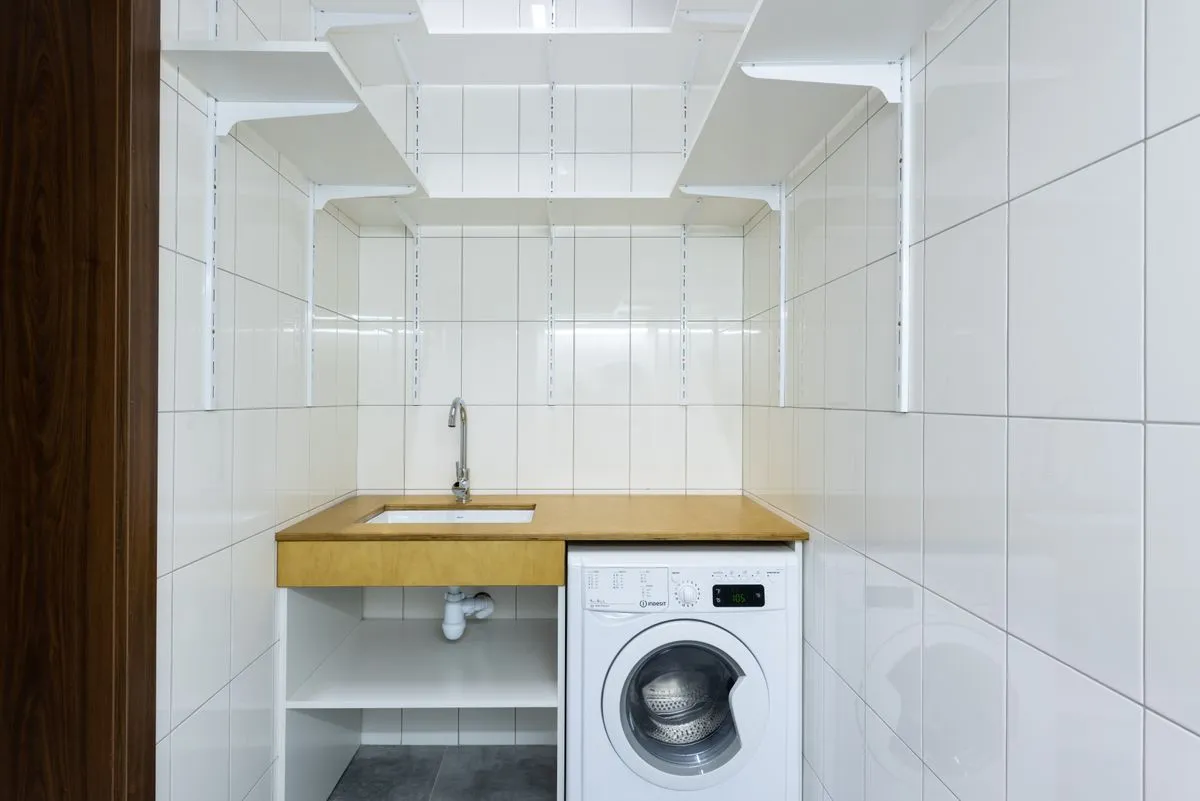
DIY tiling is a practical way to update a bathroom, kitchen, entryway, utility room, or fireplace while controlling the renovation budget. The best results begin with accurate measurements, a suitable tile, and a surface that is clean, stable, and flat enough for the chosen format. Homeowners often focus on the visible pattern but overlook adhesive coverage, movement joints, and curing time. Our guides connect design decisions with installation technique so your finished room looks good and performs well.
Before starting DIY tiling, measure every wall and floor section separately, then subtract permanent openings and add a realistic allowance for cuts and breakage. A simple sketch can reveal whether the layout ends with narrow strips at a doorway or an unattractive sliver beside a cabinet. We explain how to find visual center lines, dry-lay important areas, and adjust the starting point without losing symmetry. Planning for these details can save a full day of removal and reduce material waste by 10 to 15 percent.
Choosing the correct tools makes DIY tiling safer and more efficient. Ceramic wall tile may need a basic scoring cutter, while thick porcelain, mosaics, and angled cuts often require a wet saw or specialized blade. You also need the right trowel notch, spacers, level, mixing paddle, grout float, and protective equipment for the tile and substrate. Our recommendations focus on what the tool must accomplish, helping you rent expensive equipment when buying it would not make financial sense.
Surface preparation is the foundation of dependable tile installation. Painted walls may need cleaning and abrasion, uneven floors may require a compatible leveling compound, and wet areas need a properly installed waterproofing system before tile is applied. DIY tiling over movement, dust, moisture, or weak material can lead to cracked grout, loose pieces, and water damage. We show you how to perform simple checks and identify situations where an experienced professional should inspect the structure.
Whether you are installing a small backsplash or planning a complete bathroom renovation, a measured sequence keeps the work under control. Set manageable sections, check tile coverage before the adhesive skins over, and remove squeeze-out from joints while it is still easy to clean. Allow the recommended curing time before grouting, washing, or placing heavy furniture on the surface. For a personalized DIY tiling plan, contact Tilewise Studio with your room size, tile choice, and a few clear photographs.
Yes, many beginners can complete a backsplash, small bathroom wall, or simple floor when the surface is sound and the layout is planned first. DIY tiling becomes much easier when you practice cuts on spare material, establish reference lines, and work in small sections. Start with a straightforward rectangular room rather than a complex wet area with multiple angles. If the substrate moves, has serious moisture damage, or requires structural repair, ask a qualified professional to assess it before you begin.
For a simple straight layout, purchase about 10 percent more tile than the measured area to cover cuts and occasional breakage. Complex patterns, diagonal layouts, small mosaics, or rooms with many corners may require 15 percent or more. DIY tiling also benefits from keeping a few unused pieces for future repairs, because a matching batch may not be available later. We calculate waste based on your room shape and tile dimensions instead of applying one percentage to every project.
Waterproofing is essential in shower areas, around tubs, and anywhere regular water exposure can reach the substrate behind the tile. Tile and grout are not a complete waterproofing system, so moisture can travel through joints and damage walls or floors if the membrane is missing or incorrectly detailed. Before bathroom DIY tiling, check corners, pipe penetrations, niches, seams, and transitions carefully. Local building requirements vary, so follow the approved system instructions and obtain professional help if the existing construction is uncertain.
The right adhesive depends on the tile material, size, location, substrate, and moisture conditions. A suitable cement-based thinset is commonly used for many floors and walls, while some specialty tiles or surfaces require a modified formula or manufacturer-approved product. DIY tiling should never rely on adhesive chosen only because it is inexpensive or convenient. Read the product data sheet, confirm open and curing times, and use the recommended trowel so enough adhesive contacts the back of each tile.
Begin with a flat substrate, use an appropriate mortar bed, and check both the surface and tile backs for dust before setting. Spread adhesive in consistent lines, fully collapse the ridges, and periodically lift a tile to verify coverage, especially with large-format pieces. A leveling system can help control height differences, but it cannot compensate for a badly uneven floor. Careful DIY tiling also means checking adjacent tiles with a straightedge before the adhesive hardens.
Follow the adhesive manufacturer’s curing recommendation rather than relying on a fixed number of hours. Many standard installations need at least 24 hours, while cool temperatures, high humidity, large tiles, or dense porcelain can extend that period. Grouting too early can move tiles, trap moisture, or weaken the bond beneath the surface. In a DIY tiling project, use the waiting time to clean joints, confirm alignment, and protect the installation from traffic.
Spacers are useful for maintaining consistent grout joints, while a leveling system can reduce height differences between neighboring tiles. Neither option replaces a flat substrate, correct adhesive coverage, or careful installation technique. For DIY tiling with large-format porcelain, leveling clips may be especially helpful on open floors where uneven edges are easy to notice. Choose the joint size recommended for your tile and remove reusable or break-off components according to the product instructions.
Share your room size, tile choice, and a few photos. We will help you choose the next practical step and avoid expensive mistakes.